With the S15’s interior, the plan was always for the area behind the front seats – housing the Miracle Cross Bar and seat delete – to be the star of the show, drawing your attention and making the whole package somewhat distinctive in the sea of modified S15s. However, no amount of shiny scaffolding or MDF paneling would make up for an otherwise tired-looking and improperly-wired interior.
My exact words when I first revealed the car on the blog were “the interior was in great shape” and to be honest, for a platform that goes hand-in-hand with drifting and – let’s just say it – neglect, a few pieces needing to be replaced were a pretty small price to pay considering its age. Overall it did look pretty good considering the time that had passed but when the car received its fresh paint the interior began to look that little bit worse in comparison. However, upon pulling it out so that the car could be sent off for that paint I discovered its issues extended beyond just the surface. Maybe it was a little worse than we had anticipated…

Rewinding a little bit, the first big step in bringing the interior back up to par was to remove a few pounds of now-unused wiring that was still snaked throughout the car. Most of it was addressed last season but a bit more was found and removed this year; wiring from various accessories and prior modifications the car had seen in its life had all been left in behind the dashboard and even through the engine bay, so wire by wire it was all removed and kicked to the curb. It was like some kind of magic trick, as it seemed like no matter how much wiring I removed there was still more waiting to be discovered. The amount of room that was cleared up behind the dash was nothing short of incredible.

Fast-forward to this season – and Driven prep specifically – and it was time for the interior to go back together for good. Until this point bits and pieces had been coming and going so the interior was in a constant “work in progress” state. The very first step then was to finally address the rest of the wiring issues so that I didn’t have to worry about what was hidden behind the dashboard; ignore the orange masking tape here as that was applied by me when I tore the interior apart, to label all of the connectors so that when I inevitably forgot where everything went I could still plug things back in properly. What you’re looking at is the wiring for the aftermarket head unit, and you’ll note that whoever put it in used duct tape to seal up all of the twisted-together connections. There was not a trace of solder or heat shrink anywhere in this.

And so, I had to remove the duct tape, clean off all of the sticky residue, properly twist together the wires, solder the joints, and seal it in heat shrink – one connection at a time, so as to not mix anything up. I would have preferred for the joints to be staggered a bit (thus avoiding a lump in the middle of the harness) but they were all cut at the same location originally. The few unused wires for extra functions were also fully sealed up and tucked aside.

After a while the harness was ready to go and I could just about begin refitting parts for good. Before that though, I gave everything a final wipe-down to remove any dust or dirt because the expectation (hope) is to not be back in here for a while.
Before the center stack could go back together fully however, the center console had to be bolted down…but there was no way the original was staying in the car. This had always been the eyesore of the interior, though at least the main issue wasn’t visible from the driver’s seat.


At some point in the car’s life something had been mounted to the passenger side of the console, and it had been done so with screws. Even if the side didn’t have the extra ventilation though the console still showed countless marks across its entire surface, surely from all manner of things over the years; watches, bags, someone’s sandpaper collection perhaps. The entire piece had to go and from the day I first picked up the car I was holding out hope that a brand new OEM replacement could be found.
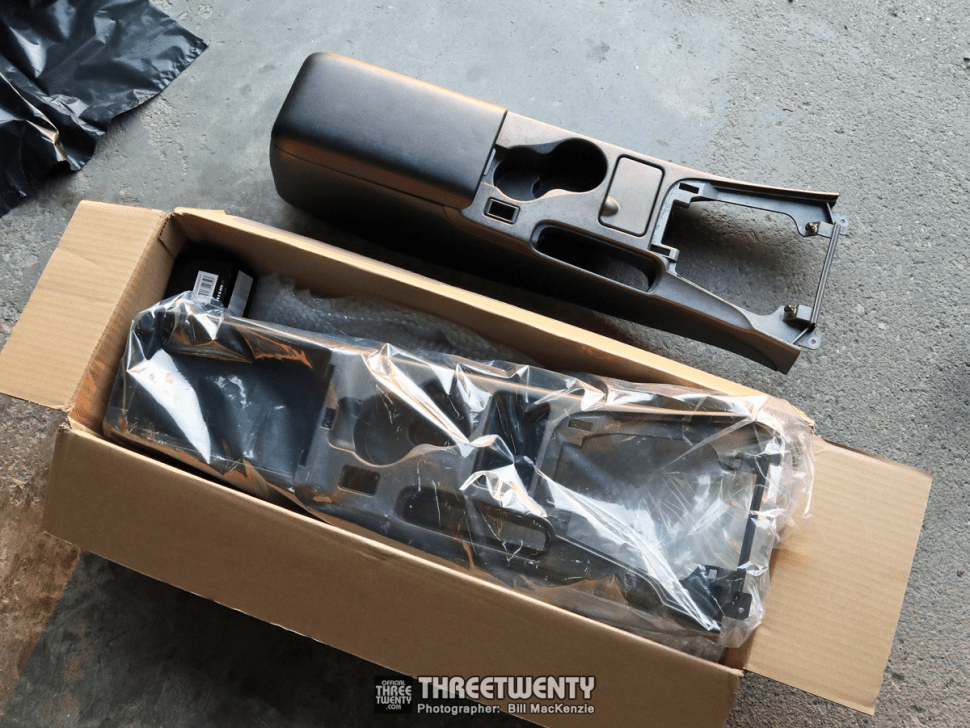
And, one was!


Even in these slightly sub-par photos, the difference in the panels is obvious. The original console hadn’t just been the interior’s biggest eyesore, but one of the biggest in the entire car; I was overjoyed to finally have a perfect, fresh-out-of-the-box OEM replacement for it. You’ll note that the ashtray and coin holder are separate pieces though, and those I did not have replacements for. Fortunately each of the car’s originals cleaned up very well with a thorough detailing and didn’t look out of place once popped into their new home.


The little light that attaches to the ashtray pocket also had to be moved over, but not before a clean of its own.

With the center console in place it was then time to put the head unit and climate controls back; the displays were given a light polish (shown here) and then each unit was fully wiped down to get all the dust and dirt out of the nooks and crannies.

The last bit for the dash was the stereo/shifter surround, which has been shown before. I believe I had mentioned it in a prior update some time back but the reasoning behind colour-coding it wasn’t just because I thought it would look good; this piece had been cracked some time in its life, but being a textured panel it would have been impossible to repair without losing part of the molded-in grain (and lets not even get into trying to replicate the finish). Instead of trying to track down a replacement I asked Speedy to go ahead with repairing it and then to smooth the whole thing over so it could be sprayed alongside the car. With the exterior being a neutral gray, I figured a small bit inside wouldn’t be too overpowering and still look at home alongside the other grays and blacks.


By this point the OEM items from the parts pile – including a few more new clips and bolts – had all made their way into the car so it was time to turn my attention to the few aftermarket bits that I’d also picked up. The car’s original shift boot had some small tears so I promptly turned to RedlineGoods as their products had always been incredible in the past (Mustard and Dijon both run various pieces from them, and Arabis has a small stack of parts to go in now too). I ordered a replacement boot in black Alcantara, with blue stitching to match the seats and door panels. I made an educated guess that Medium Blue (that’s the actual name they use for it) would be a match, and it’s pretty much spot on! The shift knob is the same Yashio Factory piece I’d picked up a couple of years ago, specifically the 5-speed version since the car is a Spec S.

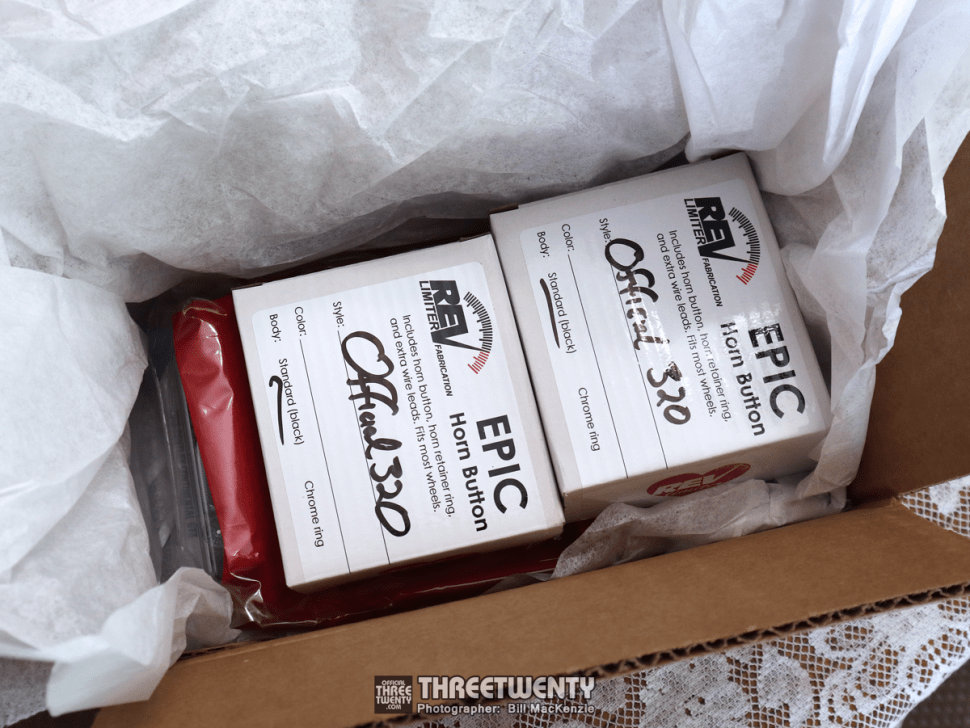
I mention the shift knob because that led to the commissioning of a custom horn button, from none other than Mr. Revlimiter himself: Adam Wolf!
Having been a regular reader of his blog for many years – but not a Miata owner – I was excited to finally have the opportunity to pick up one of his products and have some of his handiwork in a build.

With horn buttons being fairly universal – and the S15 needing one – it was a no-brainer to pick up a couple from him especially since I wanted something that couldn’t be bought off the shelf.


Worth noting before we move to the actual horn buttons though, are the extras he included: decals and a Hotwheels! If you’re reading this, thank you very much Adam! One of the decals lives on the inside of the S15’s trunk lid alongside the others I’ve collected from friends, shows, and companies.

After checking out the bonus goodies it was time to unwrap the buttons themselves: Adam was brilliant to work with as he was tasked with trying to mimic the Yashio Factory pink from my shift knob (without actually having a real-life reference) and he got pretty dang close. The design then, of course, was the blog’s logo because why not? Instead of doing something like a Nissan/S-Chassis-themed button, I wanted to have a little easter egg specific to myself and this site.


To have something nicer framing the new horn button, the old plain black steering wheel hardware was then finally retired in favour of some burnt titanium pieces from Thunder Bolt. I couldn’t help but laugh at the insane amount of packaging and paperwork that came with them (all this for 6 tiny bolts), but it was certainly a nice “unboxing” experience!

I’ll also highlight – just for the sake of completion, since it was actually installed last year – that the car now runs a Nightrunner x Works Bell quick release instead of the neochrome unit it originally came with. The black finish was a much better fit for the interior and it let me support Reggie with one more sale.
At this point we’re nearly finished with the interior updates, but if you’re looking at the above photo closely you may be wondering about the still plain-jane hardware holding said quick release to the column and why I hadn’t changed it out. Hilariously/embarrassingly, when I was looking at this photo one night (I think I was moving files around on my computer) it occurred to me that I should really change the hardware out as well to match and I was surprised that I’d missed it. It then occurred to me, that it had already occurred to me, and I had ordered titanium hardware for it, and then forgot to install it. Whoops…


And so as the final change to the interior for 2021 it finally received the temporarily-forgotten-about hardware, this time from TiBurnt; I’ve had a couple of sample bolts from them on my desk for a few years now – souvenirs from one of the Driven Calgary shows – and wanted to finally order something. Yes the burn pattern is different to that of the Thunder Bolt hardware but I don’t see myself changing out one or the other unless I really run out of things to do to the interior.


And with that, the interior was finally “complete” for the first time since before the car went off for paint and it was finally something I could be proud of too, alongside the refreshed exterior!


Photos often did hide some of the wear and tear that various pieces displayed, but seeing the interior in person does show a remarkable improvement in its overall condition. Little scuffs are gone (either from polishing or replacing parts), the colour-matched console trim looks phenomenal, and I’m happier knowing that there’s no longer a huge mess of duct taped wiring hiding behind the paneling…not to mention about 50 feet of wiring that wasn’t even doing anything anymore.


The colour scheme is entirely subjective I realize but I far prefer the new pink and blue accents to the previous neochrome and wood grain; I’m also very pleased with the final mix of OEM, aftermarket, and custom pieces. It’s a comfortable and civilized interior (no rattles, no crazy road noise, still has a radio and heating/air conditioning, etc.) but still looks a little more exciting than a stock example with the Miracle Bars out back and details up front.

That said, the interior won’t stay exactly like you see it forever. Similar to the exterior, it’s basically where I want it but I’m still keeping my eyes open for a few more replacement OEM pieces to freshen it up even further, and maybe a couple more period-correct or rare upgrades. A new steering wheel remains as the item on top of the list though and will happen – I know exactly which one I want, I just need to get around to actually ordering it.

That’s all for another time however. With both the exterior and interior overhauled, my main plan for 2022 is just to drive the car ahead of the eventual engine and bay makeovers sometime further down the road (some minor maintenance will be due though). There’s another car scheduled to be the main project next year so the Silvia can rest easy knowing it won’t be getting pulled apart again, just yet.
-Bill