Another break in our weekly posting schedule means that yes, it has continued to be hectic around here! With iMSS X having now taken place (along with a few other events) it means we now have a bit of time to relax slightly before the next and last “major” show of the year occurs at the end of September – High River – and can get caught up on some other installs, planned day trips, and content.
As sets of photos from other projects and shows are being edited in preparation for their own entries a bit later on, for this weekend we have the article to follow up the latest video on our YouTube channel which highlighted the install of Yolanda’s new fenders! It has been a little while now since we’ve had a dedicated Mk3 post and it’s definitely time we shared more on the fitting of these carbon fiber panels, so let’s get to it shall we?
As always the video in question has been linked – as you can see above – in case anyone missed it or wanted to easily find it when visiting this post in the future. The entire install is more or less the same as swapping OEM fenders out, save for some adjusting needed to get panel gaps as tight and even as possible – more on that in the post. There’s no cutting/welding/etc. required as these do bolt on, but as with any time you’re fitting new panels (OEM or aftermarket) expect there to be some fiddling required for them to fit tidily. These, being aftermarket (and exposed carbon), made it a bit more tedious but it was nothing that couldn’t be dealt with, with some care and time. A bit more time than we had anticipated, but it was a fun day regardless. Haha

The first time these were seen on the blog was back in our Driven ’22 coverage (the first show Yolanda attended with them fitted) but today we rewind back just a bit further, to April when we installed them.

While we’ve dealt with altering fenders on other builds – specifically via fitting SS Tuning flares to Sriracha, Mustard, and then Dijon – we had never before fit a set of replacement aftermarket fenders. For this, Yolanda turned to Anderson Composites’ pieces as (to my knowledge) they have been the one and only offering for Mk3s that completely replaces the OEM panels. I will point out that her set did not come from Anderson directly as she found some here in Canada already, so the packaging may not reflect what you’d get if you ordered brand new from the source. Regardless, I was keen to get them unwrapped and see them for myself. Prior to this install Yolanda had already taken them in for PPF as she was wanting to keep the weave exposed, but naturally not have it get destroyed by rocks or other debris. If she ever decides to paint them in the future she can simply peel off the film and have mint fenders immediately ready for a scuffing and spraying.

As for the weave it did look quite good, and you can see the removable vent inserts in place in the photos above as well. I will point out for clarification – since even Anderson’s site lists these as “2016-18 RS fenders” – that, for the millionth time, ALL MK3 FENDERS ARE INTERCHANGEABLE. Haha. I see so much confusion about this online and people adamant that the fenders were changed with the facelift, or different for hatches vs sedans, or model year, or trim, or so forth. The one and only Mk3 fender that is unique is the Electric’s fender with the charge door, otherwise every fender from a 2012 S to 2018 RS LE is the exact same and can be swapped from one to the other. You could even swap that Electric fender onto your own Mk3 if you wanted to have a dummy charge door or do something custom there…

Anyway, with my garage cleared out the ST was rolled in and soon set on some jackstands so we could pull the front wheels and get to work.
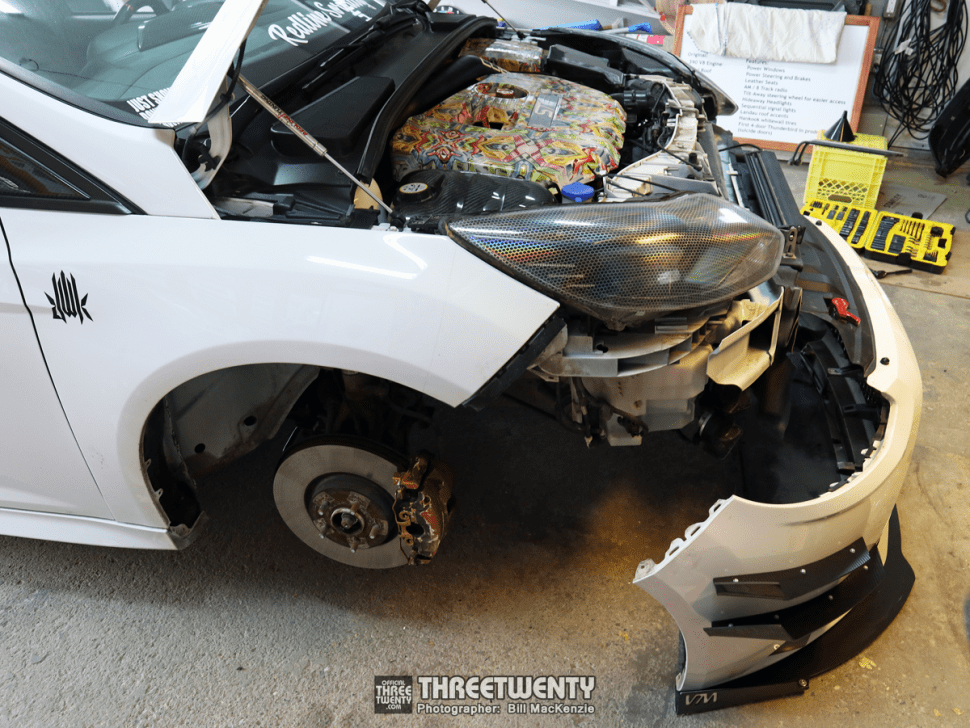
As noted in the video, none of this was necessarily a “how to” but rather a “here’s what happened” approach to covering the install. We’ve disassembled these cars enough and shown them in pieces so many times that we’re just getting right to the fenders more or less. Haha

With the wheels and fender liners all gone, the front bumper was soon removed and carried outside so that we could then pull the skirts and other trim, to get to the rest of the fender bolts. Each fender mounts with bolts under the side skirt, beneath the headlight, along the top edge (by the hood stuts here), under the triangle-shaped trim in front of the mirror, and lastly with one behind the front wheel.

OEM fender off, and set aside for the time being with the growing pile of parts and hardware. As always, plenty of masking tape was used along any edges that would be at risk of receiving marks from tools or other panels; for a few seconds (and cents) of effort, it can save having to repaint a panel. Upon their removal the OEM fenders weren’t yet cleaned up and packed away as they would still be needed as reference, shortly.

First though, we wanted to get the Anderson panel loosely in place to see what we’d be dealing with, and get an idea of how it’d look when properly bolted on. You can see, for instance, how the mounting tab in the upper left of the photo didn’t want to lay flat against the car – both of them (same tab on each fender) required some care and persuasion to sit properly.

Then came time for some of the first trimming. I applied some masking tape to the leading edge of the OEM fender – where the bumper bracket attached – to mark and then cut out the sequence of holes required for said bracket.

The resulting template could then be moved to the new fender and lined up, so I could open up the holes as required. You can see here that one threaded insert (bottom) had already been put in place. It was a matter of slowly working at the holes with a dremel and repeatedly test-fitting the inserts and bracket until everything fit snugly to ensure I didn’t overdo it.

When it came time for the driver’s side fender I repeated the steps, and you can see here the OEM bumper bracket securely set in place.


While the bumper brackets were the main focus of the dremel that day, a couple of other mounting holes did need to be opened up a bit to enable the bolts to pass though and properly sit in the threads on the car. Otherwise the only real concern with the fenders was a bit of excessive crown to them, so we had to lightly bolt them in place and then go around each panel, loosening and retightening hardware while carefully and strategically applying heat and pressure to get them to sit as flat and even as possible on the ST. Being unable to remedy any panel gap concerns with bodywork and paint for obvious reasons, we kept working at this for a while until we reached what we all felt was a satisfactory final fitment and then snugged all of the hardware down for good. The one bracket that refused to line up (as we highlighted in the video) was that affixing the fender to the inner wheel well/a-pillar as it simply didn’t have enough material to work with, so it was secured with a ziptie instead.

With the fenders being “black” (carbon fiber) any slight variations in panel gaps wouldn’t have stood out too much anyway but we still did out best to sit them as evenly as possible. The only remaining spot that could be a tighter fit is the back of the passenger fender, immediately below the triangular a-pillar trim panel, but overall we were all very pleased with the end product. The unexpected bonus was when all of the weaves from the different pieces lined up!


All said and done this was one of those cases where the install wasn’t necessarily difficult, but rather just time-consuming as it required some patience. Some experience fitting panels wouldn’t hurt when taking on these fenders so I wouldn’t recommend them as a first modification, but rather something to explore a bit later on after turning wrenches elsewhere. Regardless, they made a huge impact on the appearance of Yolanda’s ST and should only look even better once joined by yet more carbon fiber….(hint)


It was awesome to finally be able to see and work with a set of these fenders for ourselves – thanks to Anderson Composites for making parts like this for the community! They have no affiliation with this post whatsoever but below is a link regardless if you wish to look into a set yourself – we often get emails asking where parts on the cars came from so you can’t say we didn’t tell you as clearly as possible this time! Haha
As unique as these fenders are though, believe it or not but they’re not the only set in Calgary; there’s actually an NB RS running around with them as well. Perhaps we should try to get it and Yolanda’s side by side for some photos at some point?
Andersoncomposites.com
-Bill